Moving to Jira Cloud but using Encryption for Jira on Data Center? Here's how to safely bring your protected field values across and keep them restricted to the right people.
Moving from Jira Data Center to Cloud, but using Encryption for Jira? One of your first big questions is what happens to your encrypted fields when you migrate.
Jira Cloud can’t protect individual fields out-of-the-box, so we built
Protected Custom Fields for Jira Cloud and Jira Service Management Cloud.
It works in lots of the same ways as Encryption for Jira, but adapted for your new Cloud instance.
Values protected by the app are encrypted with AES-256, and only the user groups you assign can reveal them. A built-in import feature helps you quickly move values across, so there’s no need to retype data you have on Data Center into your Cloud instance by hand.
Because every Jira setup is slightly different, we’ve covered the overall approach in this guide. We’d recommend working with your migration partner to find the right process for your setup.
There are four main stages:
- Plan where your Data Center fields will live on Cloud.
- Decrypt your Encryption for Jira fields.
- Import them into protected fields on Cloud, either from migrated Jira custom fields or from a CSV.
- Check that everything’s protected.
What should you do before migrating?
Most of the hard work happens here, and most of it will be done alongside your migration partner, like
Adaptavist. But the general process will work like this:
- List your protected fields. For each one, note its name, type, the spaces (formerly projects) that use it, and the groups that can view and edit it.
- Check your field types are compatible. Protected Custom Fields supports Number, Text (single line) and Text (multi line). Selects, dates, checkboxes and other types can't be imported into Protected Custom Fields. For each unsupported field, decide now whether to convert it to a supported type, leave it out, or protect it another way, such as a restricted space.
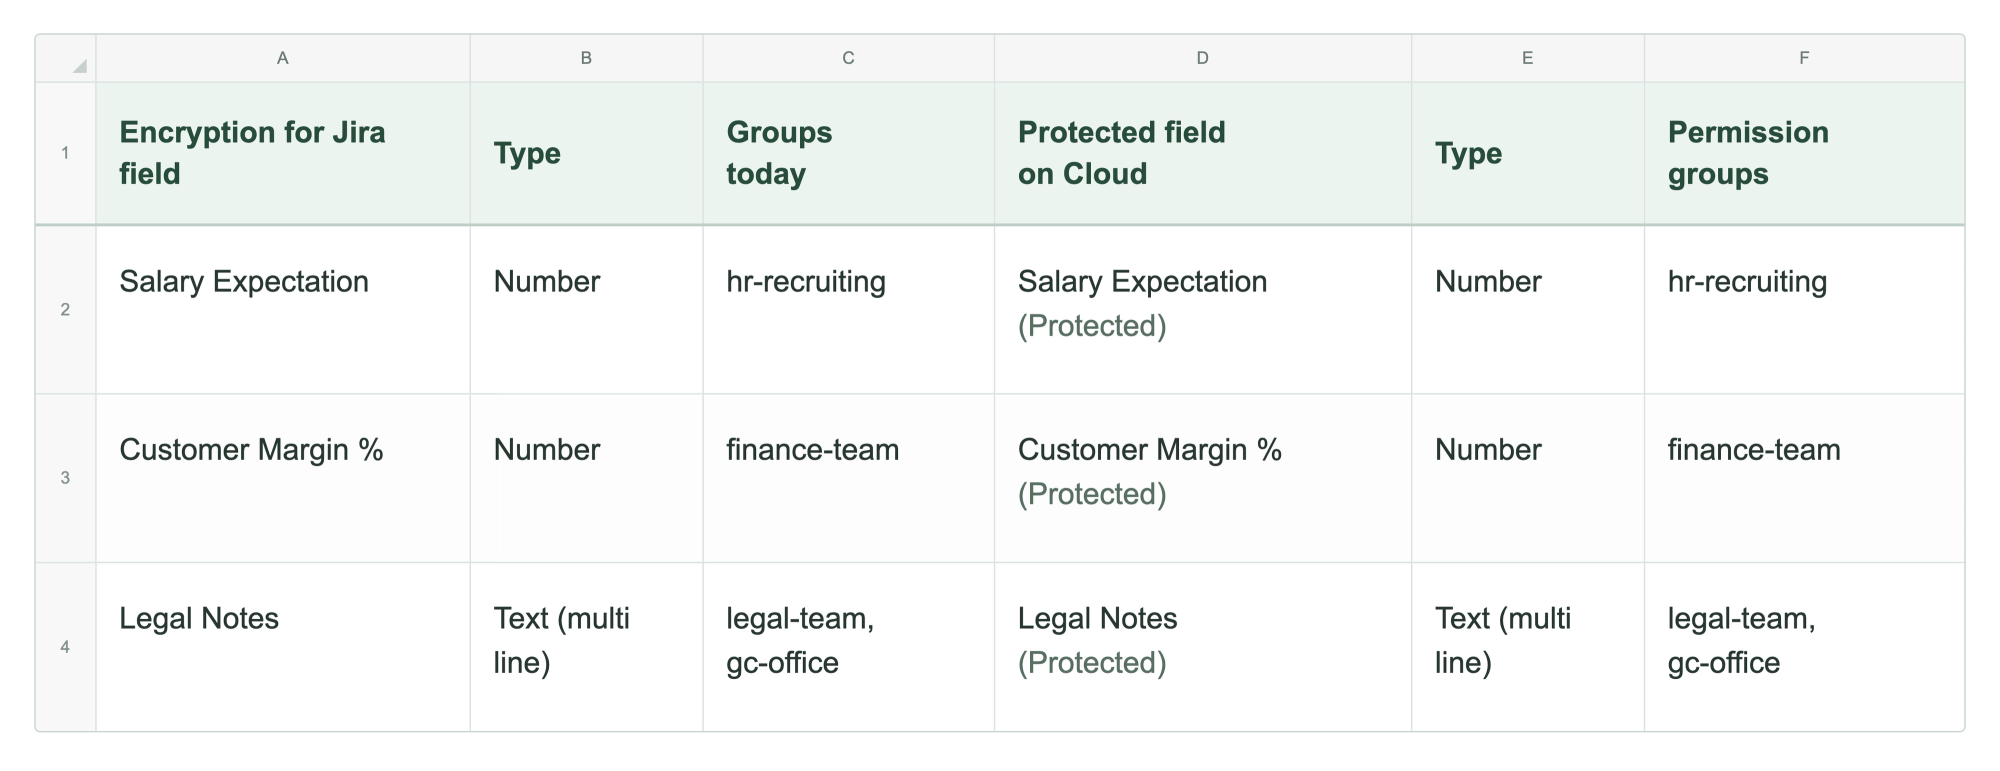
- Map your groups. Protected Custom Fields grants access to your protected fields based on Jira user groups, so we'd recommend mapping each Encryption for Jira field to its expected new field on Cloud.
It might look something like this:
This stage will be highly personalised based on your unique Jira instance and needs. If you need help with this stage, a Cloud migration partner like Adaptavist can work through it with you.
Preparing to move your data out of Encryption for Jira fields
If you're comfortable with the values landing on Cloud in standard Jira custom fields first, migrate with the Jira Cloud Migration Assistant (JCMA) as you normally would, then use the
import tool to copy those values into protected custom fields.
If you'd rather your sensitive values never sit in regular Cloud fields, you can migrate your work items without them and import the values from a CSV afterwards.
Here's how to proceed, depending on which option you chose.
Moving your sensitive data into Jira Cloud with Protected Custom Fields: two methods
There are two ways to get your values from Data Center into Cloud using the import feature in Protected Custom Fields: from your existing Jira custom fields or from a CSV. The right option depends on your unique migration project.
Whichever route you choose, do this first:
- Install Protected Custom Fields for free on your Jira Cloud site from the Atlassian Marketplace.
- Create your protected fields. Configure the new protected fields via the field configuration settings in Jira Cloud, using the mapping table from your planning stage or based on your conversations with your migration partner.
- Assign Jira user groups to your new protected fields.
Option 1: If your values are already in Jira Cloud
If the Jira Cloud Migration Assistant has brought the values into regular Jira custom fields in Cloud, you can copy them directly into Protected Custom Fields.
Keep access to the affected spaces restricted while you complete the import and cleanup.
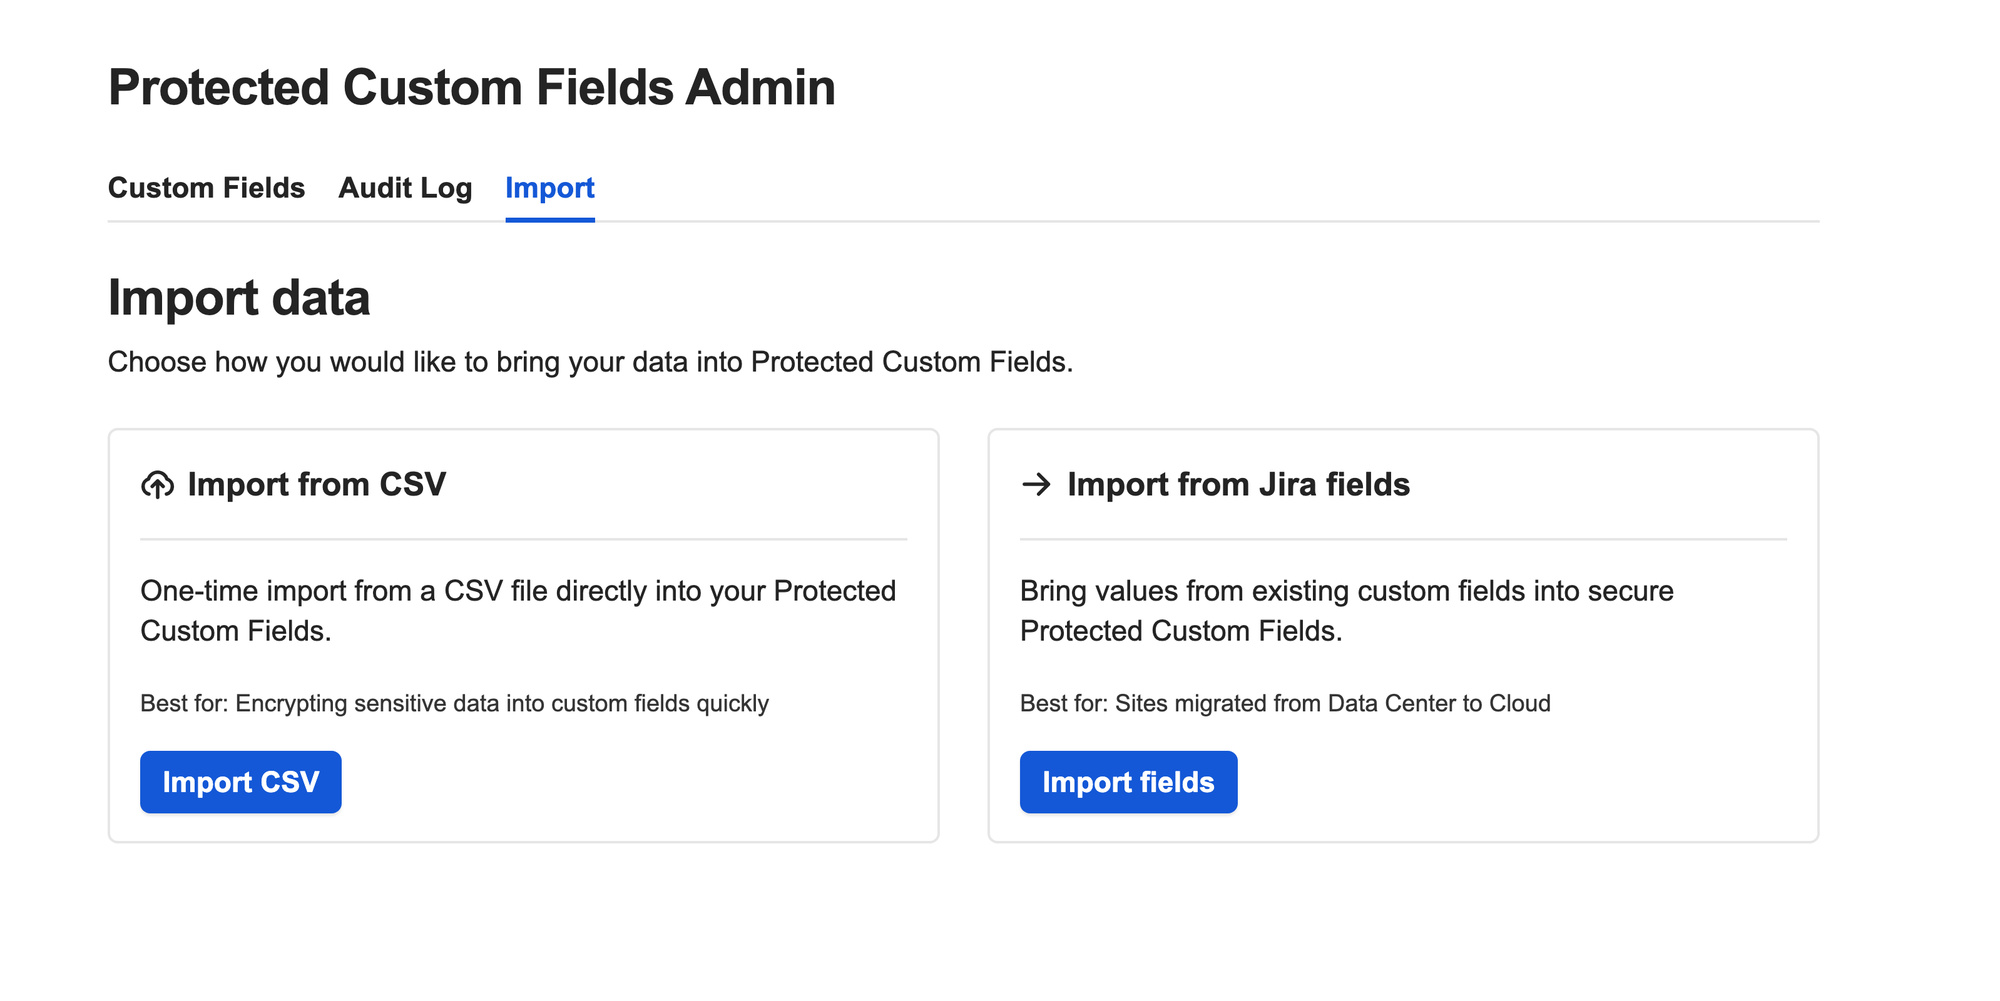
- Open the Protected Custom Fields app and select the Import tab. Choose the ‘Import from Jira fields' option.
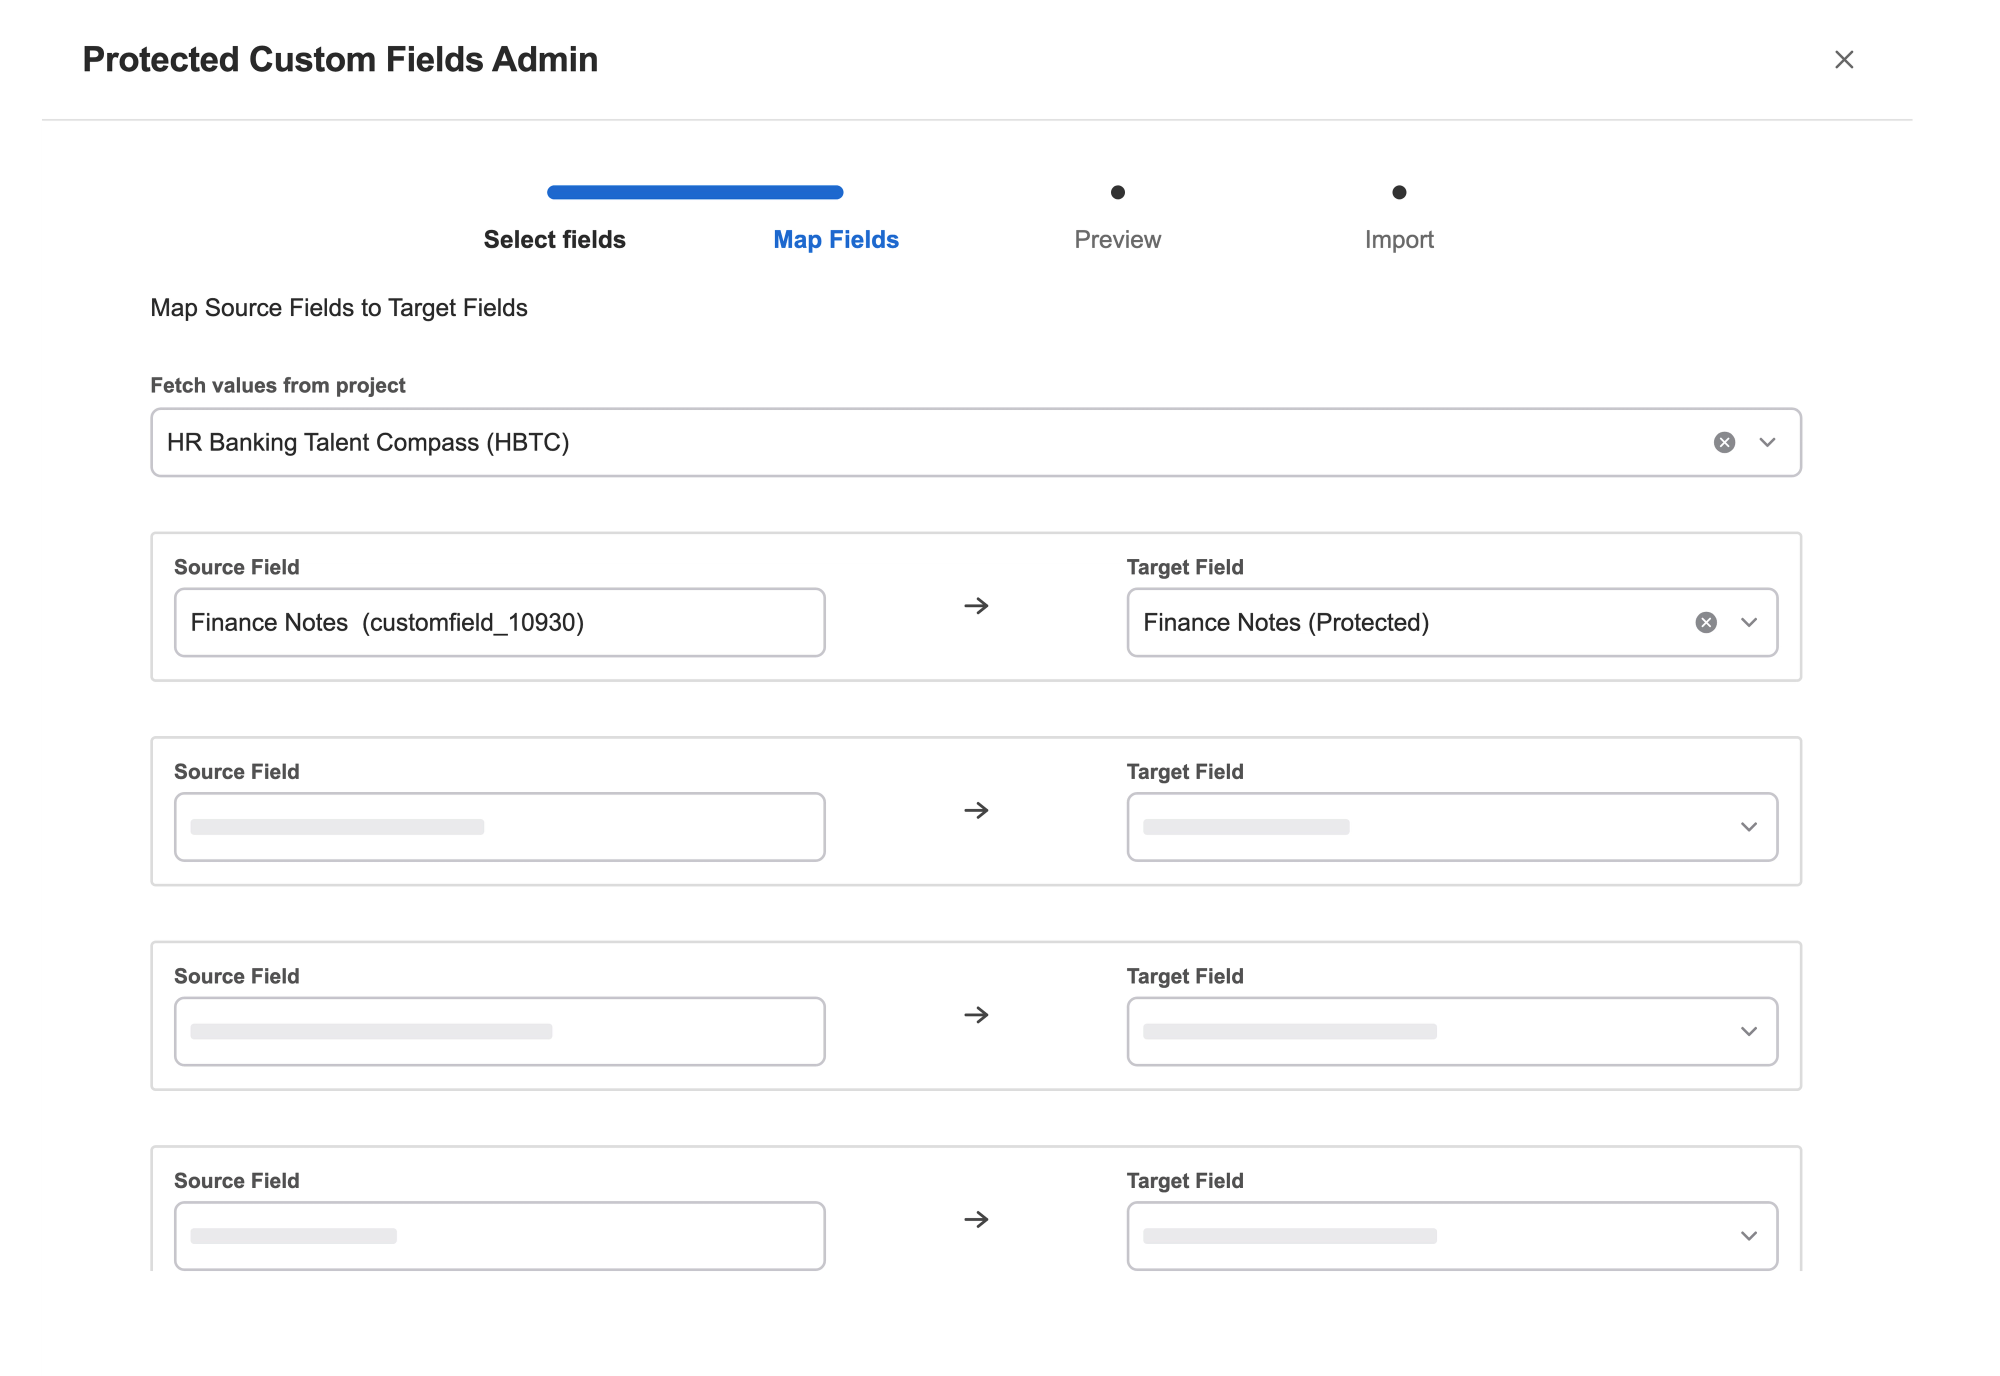
- You'll see a list of custom fields in your current space, with a dropdown next to them. Open the dropdown for each source field and select the new protected field destination it should move to. For example, you could map ‘Finance Notes' to ‘Finance Notes (Protected)'.
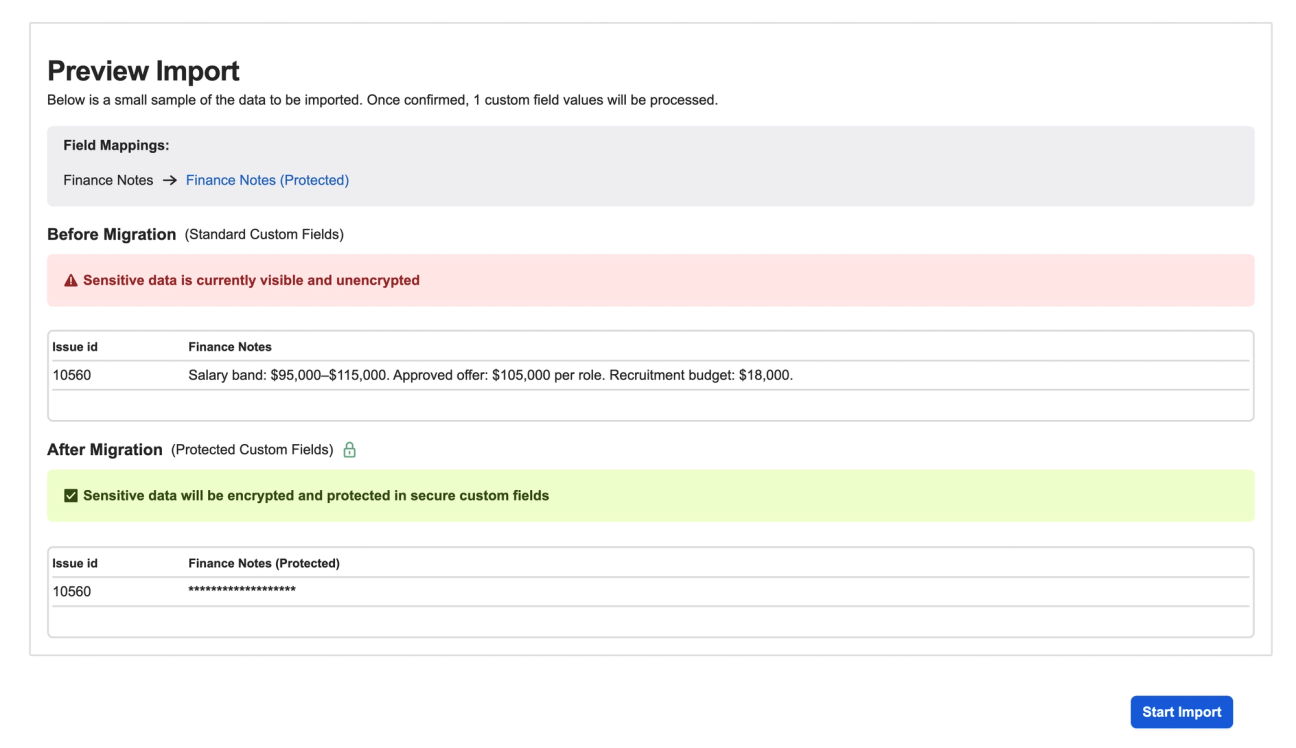
3. Preview the destinations, then run the import.
4. Repeat this process for each space you’re working on.
If you take this approach, there's one more step after the import. The Jira Cloud Migration Assistant moves your values in regular Jira custom fields, and the Protected Custom Fields import tool then copies those into new protected fields.
The original fields that JCMA moved over are still in your instance, so anyone with access can see the sensitive information. Run a check to see where those fields are, and clear them before you open your spaces up to the wider company and to anyone who doesn’t need to see that data.
We'd recommend agreeing on a supported approach with your migration partner and keeping access restricted until you've checked that the original sensitive values are no longer exposed through the work item or its history.
Option 2: If your values are in a CSV
Want to keep sensitive values out of standard Jira Cloud custom fields entirely? You can also import your values into Cloud via a CSV import. This takes a few extra steps, since the CSV needs your work items' new Cloud issue IDs. Your migration partner can help here.
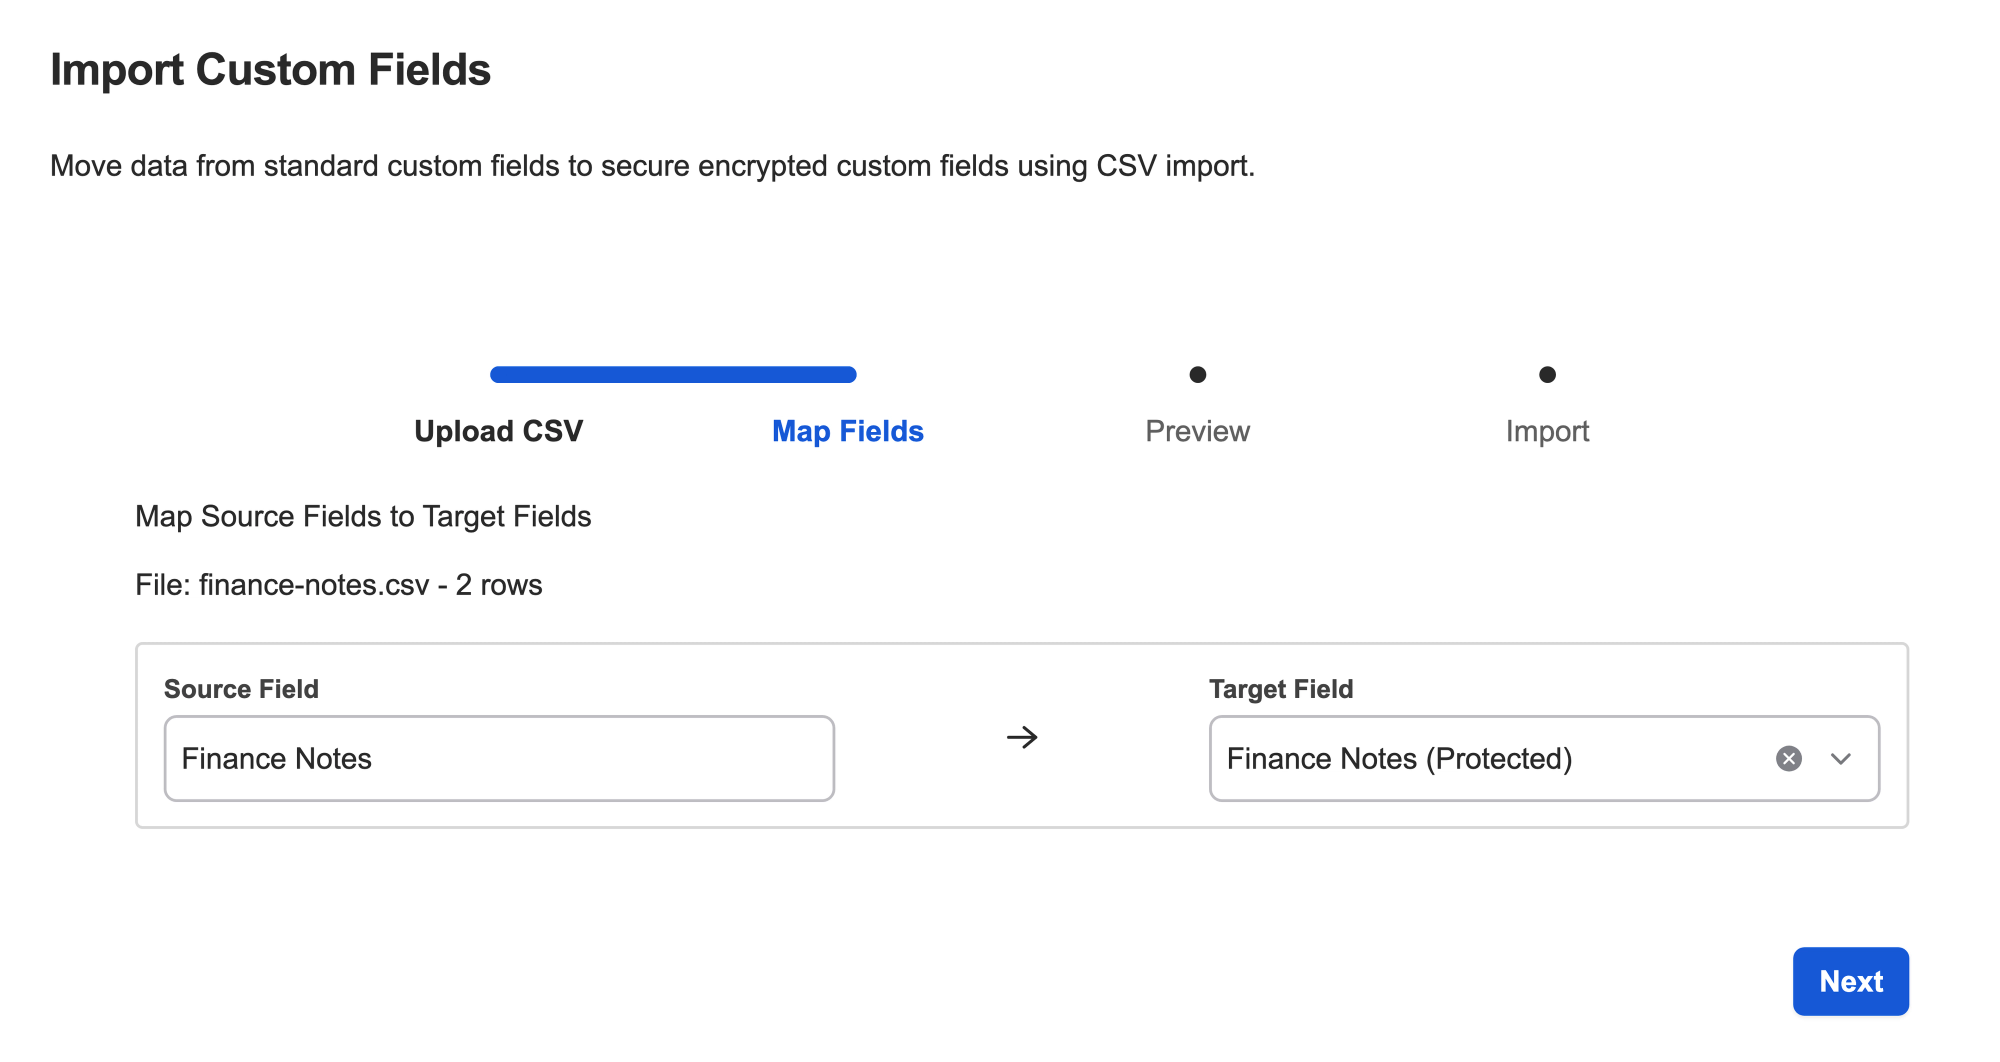
1. Open Protected Custom Fields and go to the Import tab. Then, choose Import from CSV.
2. Upload your CSV and map each field in the CSV to your new protected fields.
3. Preview the import to make sure everything looks good, then run the import.
4. Repeat for each space.
How do you know it worked?
Before opening up your Jira spaces to your whole company, check permissions from both sides.
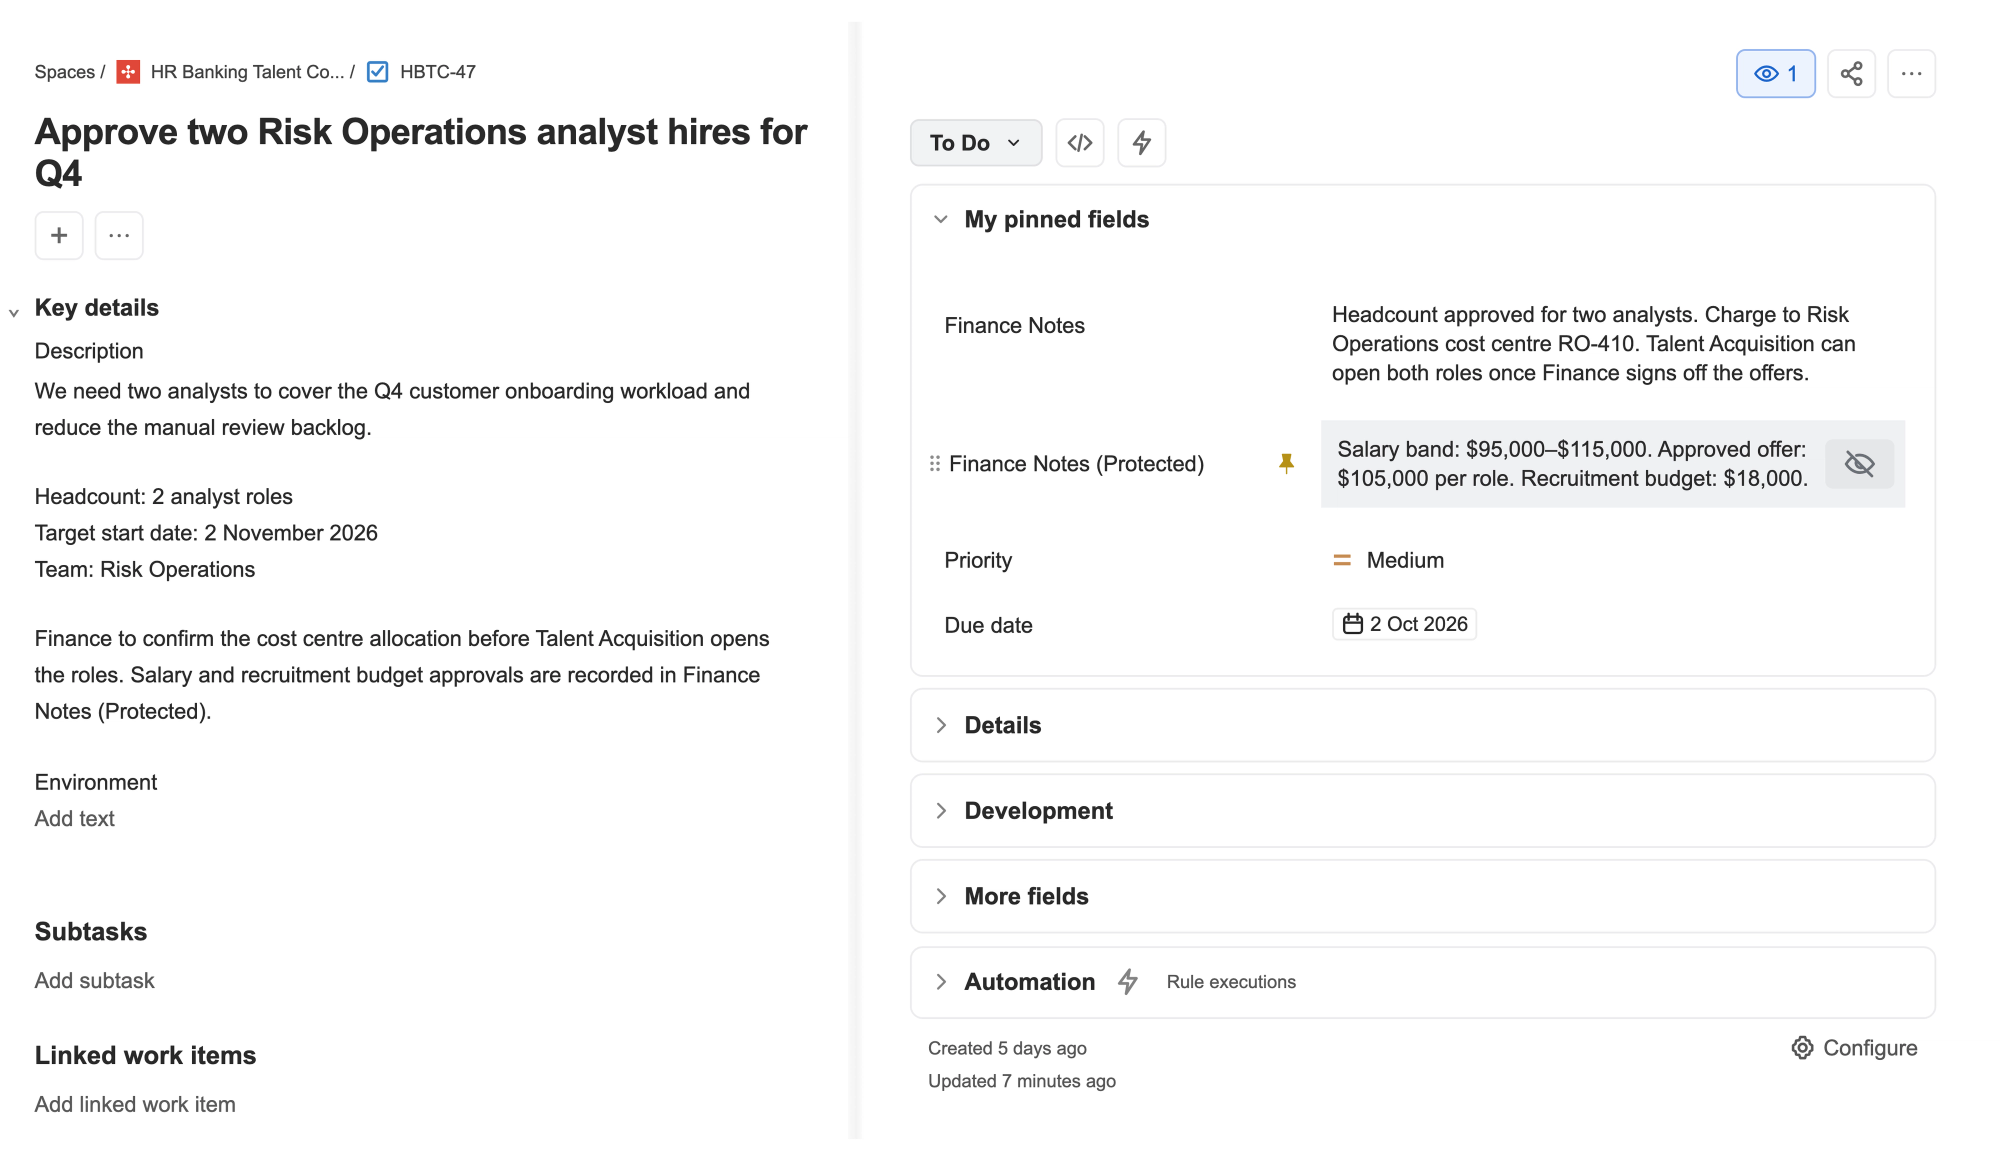
- Check an account within a user group that has permission to see a protected field. Open a newly migrated work item, reveal the protected value, and confirm you have access.
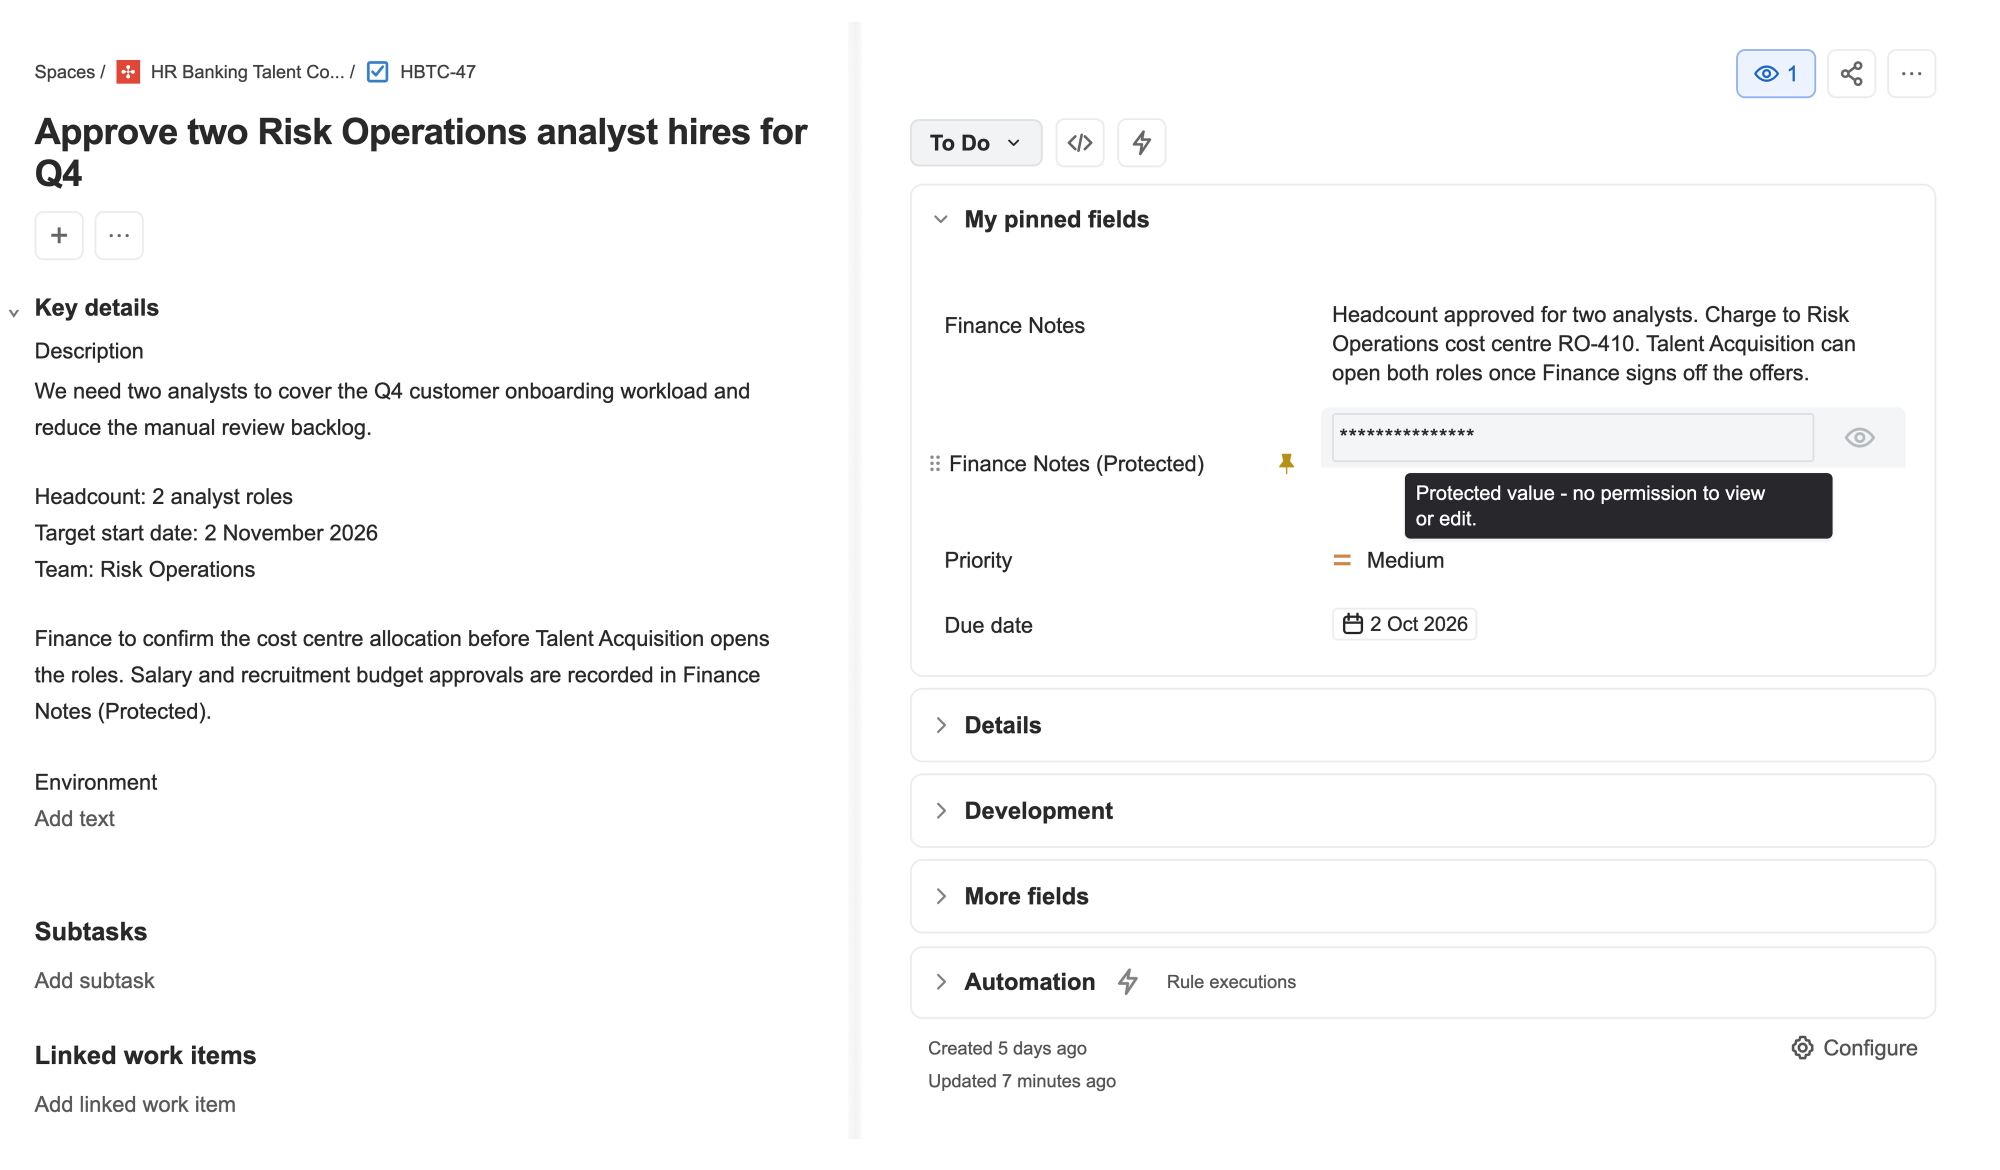
- Check from an unauthorised account. Open the same work item as a user outside those groups. The protected field should still appear on the work item, but the value won't be viewable.
If those checks pass, your fields have been successfully secured with Protected Custom Fields on Jira Cloud!
You’re all done
Your sensitive data on Jira Cloud is now protected with the same approach you had with Encryption for Jira on Data Center.
Only authorised users can reveal your protected values, and everyone else can keep collaborating on your work items without seeing them.
Ready to start your migration to Cloud?
Protected Custom Fields is free on the Atlassian Marketplace. Install it on your Cloud site, set up your protected fields, and bring your values across with the built-in import.